
Easy Video Tutorial: How to Make a Minnie Mouse Balloon Tower
Minnie Mouse air tower is an original decoration for any birthday party, themed party, or corporate event. Both kids and adults will be delighted to take pictures with this fantastic venue adornment. Its head is made of a tinfoil balloon; the body is woven out of inflatables of different colors.
Do you think only air designers can make Minnie Mouse balloon column? You are mistaken! Even beginners can make Minnie out of balloons if you follow our step-by-step instructions!
How to Do a Minnie Mouse Balloon Column: Guide for Beginners
Even if this is your first balloon figure, making one won't take long. Below you'll find detailed instructions with a list of materials for each step. Ready? Let's go!
Step 1: Make a rack
For this step, you’ll need:
- aluminum tube;
- steel corner;
- plank;
- self-tapping screws;
- duct tape;
- foil.
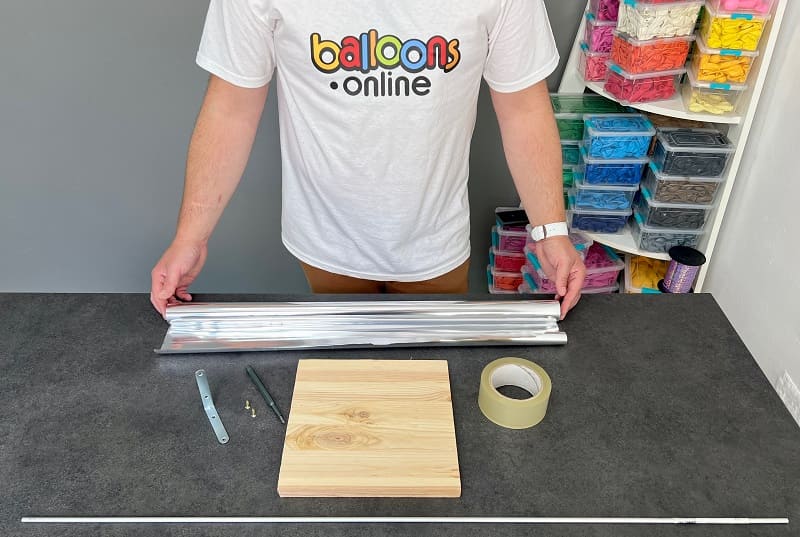
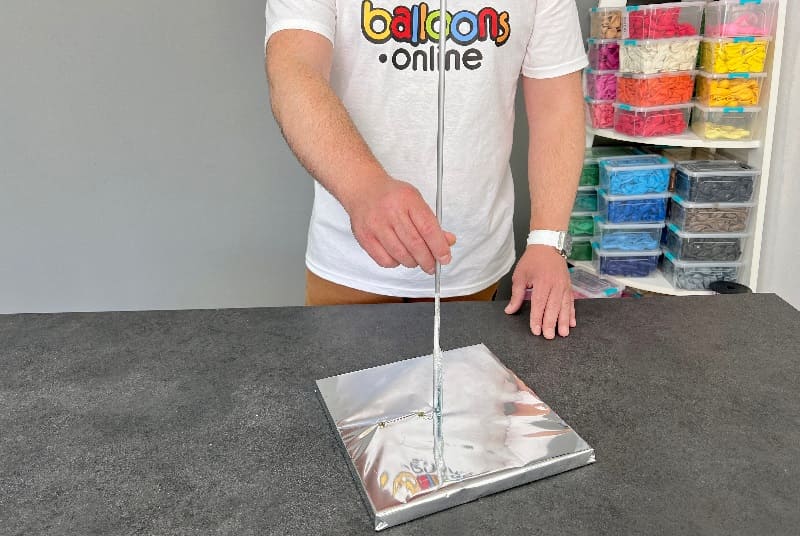
Wrap the wood plank with foil and tape the ends back together. Attach the steel corner with self-tapping screws and fix an aluminum tube to the corner. Fixate the tube with duct tape and foil to keep it in place.
Step 2: Make the bottom with a Minnie Mouse balloon column tutorial
The materials you’ll use:
- one cluster of five fuchsia 10-inch balls;
- three clusters of five black 5-inch items.
Blow five fuchsia balloons, put them together, and secure them to each other with ribbon, so they do not fall apart. You will have a semblance of a flower without a core. Put the inflatables on a stand.

Inflate the black items and connect them, using a ribbon to attach them to the fuchsia balls. Do the same with the following two clusters of black items.

Step 3: Make the top
You’ll need:
- one cluster of five 12-inch polka dots rose balls;
- one cluster of five rose 10-inch items;
- three clusters of five rose and fuchsia 5-inch inflatables.
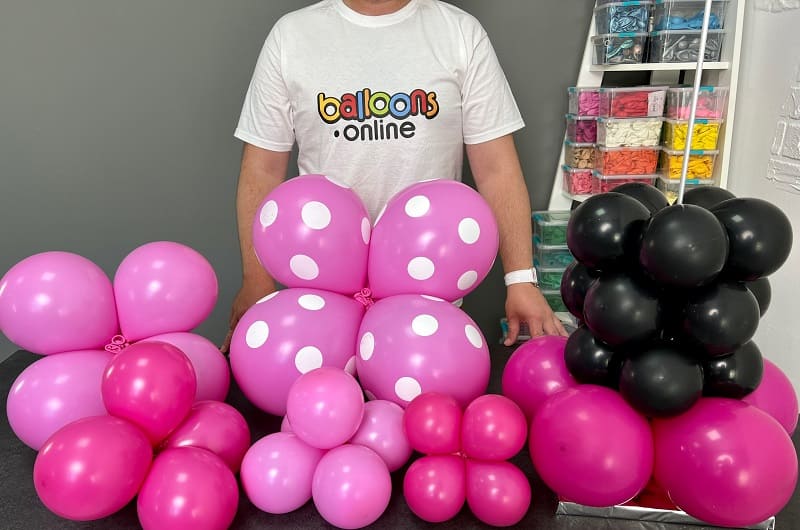
To keep making Minnie Mouse balloon column DIY, inflate the Polka dots inflatables, connect them, and fasten them tightly to a rack. It will be Minnie Mouse's skirt. Blow five pink balls; they should be smaller than the polka dots ones. Attach them to the top of the rack. Next, using the same principle, attach the fuchsia-colored items, then the pink ones, and on top of the fuchsia again.

Step 4: Make Mouse’s hands
You’ll use:
- six 160 fuchsia balls;
- two 360 black items;
- two 260 white inflatables.
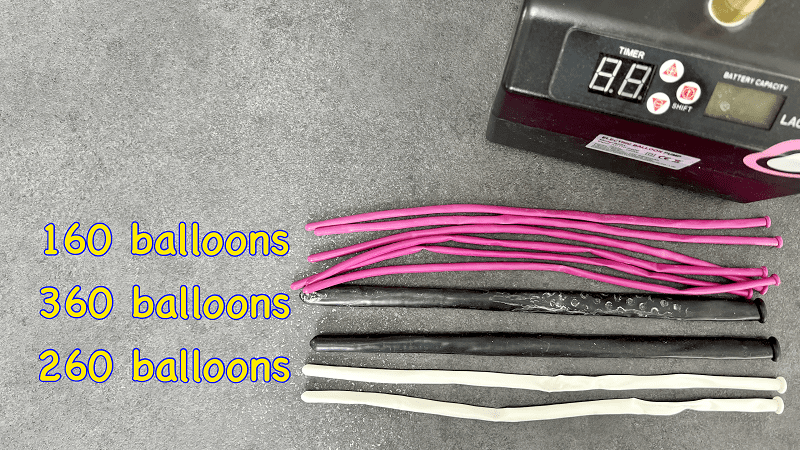
Next, make hands. Inflate the black items by about 40–50 cm. Leave a long tip to have a handy way to fix the arms to the body. Inflate the balls of fuchsia color, weave them between each other like a pigtail and attach them to the black balls. These are the sleeves of Minnie's dress. From the inflated white balls, form the palms, as shown in the picture, and attach them to the black items. The hands are ready, and now you can secure them to the body with a long tip you left on when you inflated the black items.

Step 5: Make Mouse’s head
You’ll need:
- a foil mouse’s head.

Creating a DIY Minnie Mouse balloon column is the final and easiest step. With the foil head already inflated, you need to strap Minnie to the tower. For more stability, you can use colorless double-sided adhesive tape. Your figure is ready and waiting!

How do you make a Minnie Mouse balloon stand? As you can see, it is relatively easy to make an airy figure for the celebration. All you need is enough items of the right colors, a foil head, and handy tools. If you follow our tutorial, you will quickly get the hang of it and make a gorgeous figure of a human height!


