
Does making balloon dogs and other animals still fascinate you like a child? What about twisting balloon animals on your own? That is an extremely engaging activity, yes, even if we speak about an ordinary dog. In this article, you will find out how to make a balloon dog on your own and have a good time meanwhile.
Materials you needed for your future toy
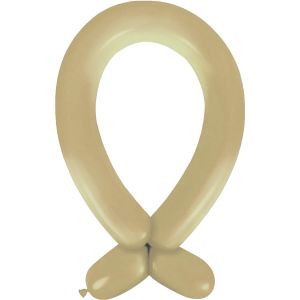
If you are wondering how to make a balloon animal dog, think about choosing the proper materials first. There are many types of air balloons available. But, for your future perfect balloon dog, you will need at least 1 260Q-size balloon. Most commonly, it is just called '260'. And yes, it is always a good idea to have at least one spare balloon.
When the balloon is full of air, it becomes approximately 2 inches in diameter and 60 inches long. You can easily find these materials in your local party store. They are usually called ‘animal’ or ‘twisty’ balloons.


Step-by-step balloon dog tutorial
The balloon dog can be surely considered a fundamental sculpture in balloon art. Most of the other animals are variations of this toy, in fact. Simply imagine how you will create all the segments logically one-by-one from the starting to the ending point. Here is how your route will look like: nose-ears-neck-front legs-body-back legs. Easily make a balloon dog with the instructions for each part you will find below.
Creating the dog's head
For this element, you will actually need to create a nose and 2 ears. The first step, in this case, is to pinch your filled balloon about 2 inches from the place where you have tied it off. Start twisting this section – it will form the nose for your future dog.
The next step is creating ears. After forming the nose, make one more pinch 2 inches long. Use the first twist as your reference point. Shape the first ear by twisting this section.
After that, fold the balloon together at the second twist. Gather and twist the elements together at the first twist. In this way, you will form the second ear and base for the dog’s neck as well.
Creating the dog's body
The dog’s body should be 3-4 inches approximately. This is probably the biggest part of the toy. While making it, make sure it looks more or less realistic and proportional to the other parts of the toy.
Making the neck and front legs
This is an important point to know about how to make a dog balloon animal to ensure it looks realistic. After you have created the dog’s head, leave around 3 ½ inches for its neck and form another pinch. The next step – make the dog’s front legs in the same way as you did for its ears.
Pay attention to the neck as it separates the dog's head and body. If the neck is made right, an animal looks much better. The same thing is with its front legs. These are the parts people notice in the first place. So, any deficiencies in these parts are not allowed. Also, make sure these elements look proportional.
Creating the body and back legs
Make the body in the same way as the dog's neck with a single difference – the dog's body should be around 4 inches long. After that, start making the dog's back legs by using the same technique as for its ears.
Tips and tricks to make a perfect balloon dog
The outcome of your first attempt at making a balloon animal dog may not satisfy you. It is totally okay for your first experience. Still, there are workable tips and tricks to help you even in this case:
- Choose appropriate air balloons (‘260’ ones that don’t have any deficiencies).
- Feel the tension when you fill the chosen balloons with air. Faster is not better in this case.
- Pay attention to proportions when making different elements. The toy should be balanced.
- Tie and fix gently. The segments should be fixed appropriately.
Here are extra details and tips that will help you make your perfect toy.
How to choose the right balloon
The answer is simple: to make all the things work well, use balloons designated specifically for balloon animals. The most popular and appropriate types are Qualatex and Betallatex. Any specialized balloons are made of the exact fabrics needed to endure the expected tension and all twists. Don't hesitate to ask consultants in a shop where you buy balloons and read the instructions attentively as well.
How to blow up long balloons
This is another important point in the balloon dog instructions. When you fill long balloons with air, the most important point is not to overdo with that. Keep doing that until 3 inches (7.6 cm) have remained from the end. Tie your balloon once you have noticed 3 inches left. This small tail will be actually used a bit later. It will organically serve as a tail for your future toy.
How to tie balloons
One of the most important points of any workable balloon dog tutorial is making the twists right. Practically, beginners often find it a bit problematic. You have to twist your balloon around 3 times at least for each section. It is important to do that in the same direction always. By following this simple advice, you can make bubbles of any size – whether little or big ones.
Bottom line
If you have grasped how to make your air toy but something goes wrong in practice, watch some YouTube and other online tutorials on how to twist a balloon dog. Having examples helps a lot with fulfilling your creative ideas. Try and enjoy the balloon art at ease!


